Wow - what a week! It's definitely been a tough one for me, and I've had a great deal on my mind lately between work and school starting again. My usual escape is retreating into a book, internet surfing, or just curling up and getting some much-needed sleep, but this past weekend I decided to clean and detail my motorcycle.
Detailing your motorcycle is actually an excellent way to bond with your bike. First of all, the process is almost meditative. Taking a systematic approach and paying careful attention to what you are doing is not only beneficial for your bike - preserving all of that shiny paint and chrome - but it can also be extremely relaxing, giving you a chance to either get your mind off of whatever is bothering you, or else take out your frustration on any particularly stubborn bug stains (my windshield has a bug magnet on it, seriously).
The products pictured are ones I purchased at my local motorcycle shop; I don't necessarily endorse them, though if I experienced a problem using a product, I will note it. If you have a particular favorite, please share with the rest of us in the comments!
As a general note, I'd like to make one suggestion before you get started: either set aside a couple of hours for the task, or else break it up into a multi-segment project. As long as you do not leave any product residue on your bike, you are safe breaking the process up across a few different sessions or even days, just depending on your availability and energy. The reason I mention this is because somehow, I always pick the hottest, most humid day of the year to detail my bike, and half-way through I end up exhausted and wishing I could wait until later to finish up. Sadly my schedule doesn't really allow for it, but if yours does, it might be worth it.
Step 1: General wash and rinse

Your first step is to wash your motorcycle get all of the grit and grime off of your bike that could cause scuffs and scratches if not removed before you start waxing. You can find any good spray-on, rinse-off wash at your local motorcycle or auto supply shop; the one pictured actually worked extremely well and was an all-purpose cleaner, so it was safe for all of the bike's surfaces.
I would also like to note that now is the time to
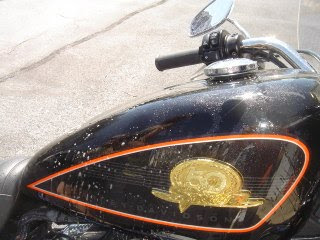
decide how you are going to approach your motorcycle washing and detailing job: front to back? Back to front? Kick-stand side or pipes side first? Pick one and stick to it; it will make your life easier later when we get to waxing.
General cleaners like this one are meant to be sprayed on and then rinsed off with a hose. I sadly don't have access to a spout, so I just use a bucket. Graceful, I know. Be VERY careful at this stage if you use a rag and water to rinse the cleanser off of your bike: first of all, make sure you get it all off, otherwise it may cause permanent clouding if left to sit. Second of all, debris caught in a rag will scratch your paint job and your chrome if it's not rinsed out right away. Don't worry if there is a bit of streaking at this stage after you've rinsed the cleanser off, though - you will be going back over the motorcycle with a detailing cleaner-wax later, so you can fix that as you go.
Also remember on a hot day that you should be very careful that the cleanser does not dry on your motorcycle as you move from segment to segment - spray on and rinse off fairly quickly toprevent this.
Step 2: Get thee in the shade!
Don't do the remaining steps in direct sunlight and heat. Move the motorcycle you are cleaning into a shady area or your garage. Leaving wax products on your motorcycle and allowing them to dry in the heat and sunlight can cause damage to your chrome and paint in the long-term - the exact result we're looking to avoid in this process! Plus... it's just a lot cooler in the shade, and who can argue with that? Heat stroke and motorcycle detailing do not go together.
Step 3: Wax-On, Wax-Off

After getting the bugs, dust, and other grit off of your bike, it's time for the detailed work. Youwill want to select a good detail/wax product. Here is the one I used. This product is actually a good, standard, decently-priced wax, and I found that it wiped off fairly easily after application, not leaving an overly-streaky residue like I have run into with other products.
I keep a big pile of clean cloths on-hand for this process. First I spray the wax onto the cloth, then apply to the bike. I let it sit for a little bit - not more than a minute at most - then wipe it off with a separate cloth.
I use a lot of cloths throughout this process but

there are those who don't; I just really like to polish for a high shine. Again, the product pictured was good for use on the chrome and the paintjob. The reason I prefer to apply it with a cloth is because you don't want to get this stuff on your brakes - be very careful, otherwise
you create a dangerous situation for the next time you are out on the road. Also most of these products are not good for use on leather - check the label of the one you pick and make sure you take off any pieces not recommended for use with that product.

Using circular motions to apply and remove wax isn't just for the karate kid, by the way. You'll find it to be the best way to keep from leaving an icky residue when you are wiping the wax off.
 Step 4: Corrosion Protectant
Following your washing and detailing, you will want to do a little something-something for your chrome to prevent long-term pitting or rusting. I recommend getting a good corrosion protectant. The one pictured was OK, but I found it very difficult to wipe off after applied - it left some streaking and was really oily. If anyone has any better luck with another product or any other suggestions for protecting your chrome, please leave some info for us in the comments.
 Step 5: Scratch Removal
The next step in our process is to use that elbow grease you've saved up (yeah, right) to try and buff out any scratches you might have on your paint job. Keep in mind the scratch removal polish you can get at the shop will do a pretty good job on smaller stuff, but a fairly deep or large scratch will need buffing. We'll go over that at another time - a professional grade buffer can be a good investment in the right hands; in the wrong hands, it can really damage your fancy paint job. I don't really have any particularly noticeable scratches on my bike at the moment (it's been in the garage for far too long), but use the same circular motion on your scratches that you did for the detail and waxing. The trick for this? Just keep going - your dominant arm should end up pretty sore by the end of this process anyways. If it's just not coming out, again, you should consult a professional about getting it buffed out without damaging your paint job.
Step 6: Finishing Touches
Other options are available for getting your bike into pristine condition. Some people swear by tire blackeners (possibly not a good idea if you are zipping around on two wheels, though - for the same reason you shouldn't get wax on your brakes or tires), other people like to spend hours polishing each individual spoke. Some people viciously attack errant bug splatters on their windshields with Windex or other cleaning products. Let us know what else you like to do to make your bike perfect for riding season!

No comments:
Post a Comment