A while ago, I made the decision to install a sissy bar on my 2007 XL50 Sportster. I figured why not – you never know when it will come in handy. Even if you don’t plan to ride with a passenger, if you are a beginning rider and ever drop your bike, the sissy bar is a good place to grab it while you are trying to lift it back up! While this modification is relatively simple, it takes a bit of strength and is often a tight fit when trying to maneuver around chrome and painted pieces without scratching anything.
Also, just so you are aware how most motorcycle manufacturers sell their sissy bars: you often must by the side plates, sissy bar, and back rest pad separately. The side plates are what mount to the frame of the bike; the sissy bar is the actual backrest bar; and the back rest pad is what makes it comfy to lean against. Make sure all of your parts are the correct size for your bike... I failed to do this initially and it caused a bit of grief during the whole process. Needless to say, we finally got the job done. Here is how we did it.
Step 1: Take out the bolts along the rear fender around your turn signal assembly. Some of these will have nuts holding them in place, or threaded clips. Be careful while loosening your turn signals to ensure you do not damage the wiring. Keep them in order – I suggest putting them in labeled baggies to make sure you don’t get them confused when you are re-assembling. Always used the correct-sized tool when making modifications on your bike so you do not strip anything.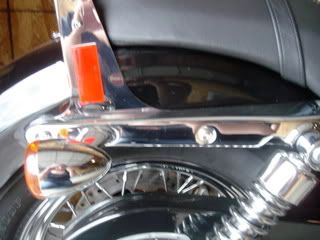
Step 2: Install the side plates between the rear fender and the frame. This is the tricky part. There are a few small pieces in the fender which might bend and keep you from being able to wedge the side plates down in there, so be careful of that. It’s common to have a few paint scratches whenever you do this part. Also make sure the notch on the side plate lines up with the wiring for your turn signal. Note: many sissy bars don’t have this setup and instead mount on the outside of the frame instead. This makes them a bit easier to install. 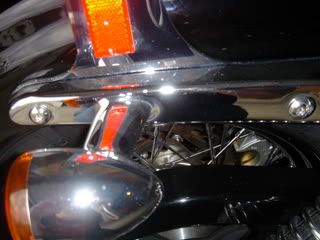
Step 3: Reassemble the bolts. This is also a little tricky, and you will quickly know whether or not you lined your fender and bolt holes up correctly.
Step 4: Place sissy bar. This is easy, just takes a little bit of pushing. Bolt it on with the parts provided in your kit.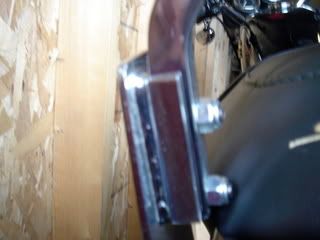
Step 5: Install the back pad. The easiest part of the whole process – just turn a few screws and you’re done!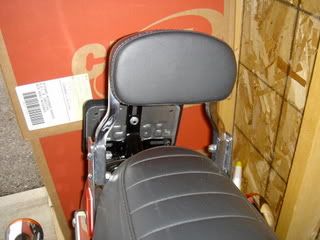
Be careful of your paint job with this installation. Also make sure you have the correct parts. I got my sissy bar assembly as a gift, and it turns out we had the wrong sized sissy bar! We re-installed the side plates a couple of times while trying to figure out what was wrong before heading over to our nearest Harley shop to exchange the part (note: you always have to do returns and exchanges at the shop you got it from). Enjoy, and make sure your man knows who will be on the back next time you two go for a ride!
Note: different bikes will have different instructions, so make sure to read the literature in your particular kit before embarking on this endeavor. Lady Rider Online will not be responsible for incorrectly installed sissy bars as a result of this article – always make sure you follow the directions that come with your kit for your particular bike.
Friday, August 17, 2007
Installing a Sissy Bar on a Sportster
Subscribe to:
Post Comments (Atom)
2 comments:
AWESOME INFO!
Good job. I'm definitely going to bookmark you!
Post a Comment